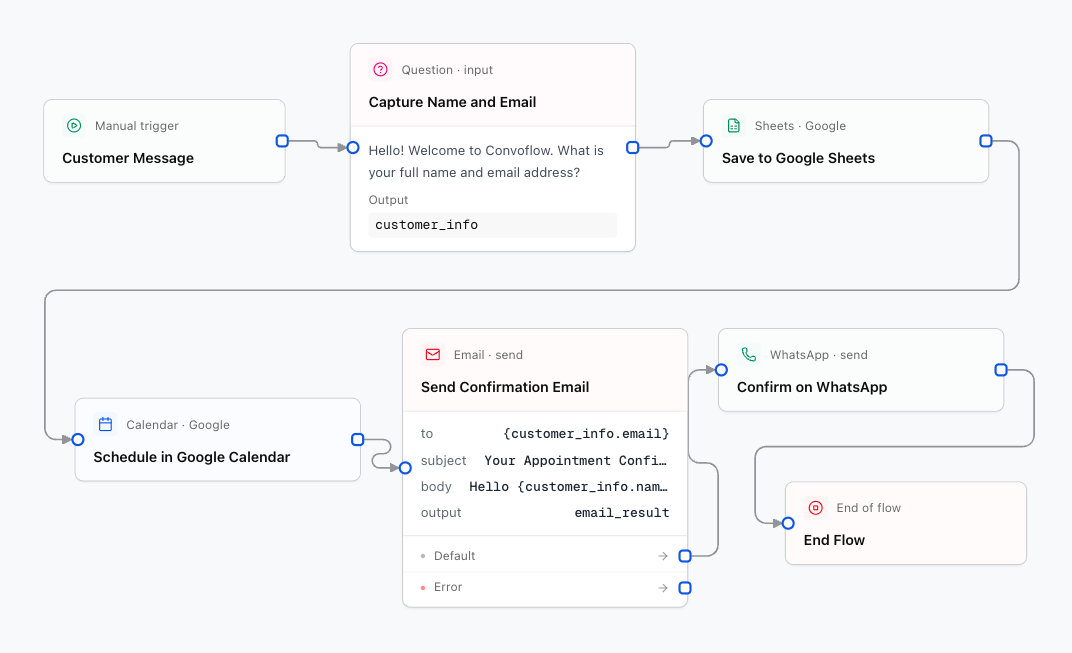
In this guide, we will build a customer flow that captures user details, saves them in Google Sheets, schedules an appointment in Google Calendar, and sends an email confirmation.
Step 1: Connect your Google Account
Before using Google nodes in your flow:
- Go to Connections in the left sidebar of Convoflow.
- Click New Connection and choose Google Service Account.
- Paste your Google credentials JSON file (or follow our Google connection guide).
- Click Test Connection and save.
Step 2: Build the Flow on the Visual Canvas
- In the main menu, click Flows > New Flow.
- Open the node catalog: Right-click anywhere on an open area of the visual canvas (or use the equivalent gesture on your trackpad, such as a two-finger click or tap) to open the node catalog and select any block.
- Add a Question block and set:
- Question:
Hi! What is your name and email address? - Save variable:
user_info
- Question:
- Connect this block to a Google Sheets node:
- Action:
insertRows - Spreadsheet ID: Your spreadsheet ID
- Rows data:
[
  {
    "Date": "{current_date}",
    "Name": "{user_info.name}",
    "Email": "{user_info.email}"
  }
]
- Action:
- Connect to a Google Calendar node:
- Action:
createEvent - Event Title:
Consultation with {user_info.name} - Include Google Meet: Enabled (
true)
- Action:
- Connect to an Email node to send the meeting confirmation with the Google Meet link.
Step 3: Test and Publish
- Click Simulate in the top right to test your assistant in real time.
- When you are ready, click Publish. Your assistant is now live and answering customers automatically.